
A Reproducible Self-Hosted Monitoring Quickstart
The exact Compose stack, its limits, and what teardown really removes
A self-hosted evaluation can stall before the product ever runs. There may be a sales form, a licence email, a YAML file full of placeholders, or a public port that should never have been public.
This walkthrough removes those decisions. By the end you will have RootTrace running on your own machine, with no vendor account or licence key. The quickstart stores its monitoring data in the local stack, and licence verification does not call a RootTrace service.
The Compose block below matches the current checked-in quickstart. Startup time still depends on your machine, network, and Docker registry throughput.
Before you start
You need Docker Desktop, or Docker Engine with the Compose v2 plugin:
docker compose versionAbout 4 GB of free memory and 8 GB of free disk. The server image is a little under 6 GB unpacked because it carries its own embedding model. Expect the image download to take longer than writing the two local files.
You do not need a DNS name, a certificate, a licence, a vendor account, or an AWS account. The image is on a public registry. You create the first local user after the stack is healthy.
1. Write the two files
Make an empty directory, cd into it, and paste this whole block. It writes the Compose file and generates a bootstrap token in one go. Nothing to edit, no placeholders to fill in:
cat > docker-compose.yml <<'COMPOSE'
name: roottrace-quickstart

services:
  mongo:
    image: mongo:8.0.28-noble
    restart: unless-stopped
    volumes:
      - mongo_data:/data/db
    healthcheck:
      test: ["CMD", "mongosh", "--quiet", "--eval", "db.adminCommand('ping').ok"]
      interval: 10s
      timeout: 5s
      retries: 12

  roottrace:
    image: public.ecr.aws/byteaffinity/roottrace/server:latest
    restart: unless-stopped
    depends_on:
      mongo:
        condition: service_healthy
    environment:
      ROOTTRACE_MONGO_URI: mongodb://mongo:27017/
      ROOTTRACE_BOOTSTRAP_TOKEN: ${ROOTTRACE_BOOTSTRAP_TOKEN:?create the .env file first}
    ports:
      - "127.0.0.1:${ROOTTRACE_PORT:-8090}:8090"
    healthcheck:
      test:
        - CMD
        - python3
        - -c
        - "import urllib.request,sys; sys.exit(0 if urllib.request.urlopen('http://localhost:8090/readyz',timeout=5).status==200 else 1)"
      interval: 15s
      timeout: 10s
      retries: 20
      start_period: 90s

volumes:
  mongo_data:
COMPOSE

[ -f .env ] || printf 'ROOTTRACE_BOOTSTRAP_TOKEN=%s\n' "$(openssl rand -hex 32)" > .env
Two things worth noticing, because they are the kind of detail that usually bites you in a quickstart.
The port binding is 127.0.0.1:8090, not 0.0.0.0. This stack has no TLS, so it deliberately refuses to be reachable from anywhere but the machine it runs on.
And [ -f .env ] || is load-bearing. Paste the block a second time without it and you would overwrite the token while the container keeps running on the old one. The file and the server would disagree, and nothing you copied would work. Guard included.
2. Start it
docker compose up -dThis is where the large image download happens. Once it is local, startup still varies by machine. Watch the actual health state rather than assuming a fixed time:
docker compose psThe server loads its embedding model into memory before it answers, so there is a gap between "container started" and "page loads." That is what the 90-second start_period in the healthcheck is for. If you would rather see it happening:
docker compose logs -f roottrace3. Claim the first account
Open http://localhost:8090.
The sign-up form on a fresh install asks for three things: a username (not an email address), a password, and the bootstrap token. Read the token out of the running container rather than the file, so you get the value the server will actually check:
docker compose exec roottrace printenv ROOTTRACE_BOOTSTRAP_TOKENSubmit, and you are in. No confirmation email, no licence to paste, no sales contact. It creates your first workspace and then closes sign-up behind you, so this form works exactly once. That is deliberate: a self-hosted install that leaves registration open is a self-hosted install anyone who can reach it can join.
You are now running the free tier. The application calls it Free; the pricing page calls it Developer. Nothing was requested from us and nothing was activated, because there is no activation server to ask, and it does not expire on a date.
It is also small, and the number worth knowing before you invest an afternoon is the retention: one user, one environment, one integration, five hosts, and one day of data. Come back on Wednesday and Monday's history is gone. That tier is sized to show you the product working, not to run on, and pretending otherwise would only move your disappointment to later in the week.
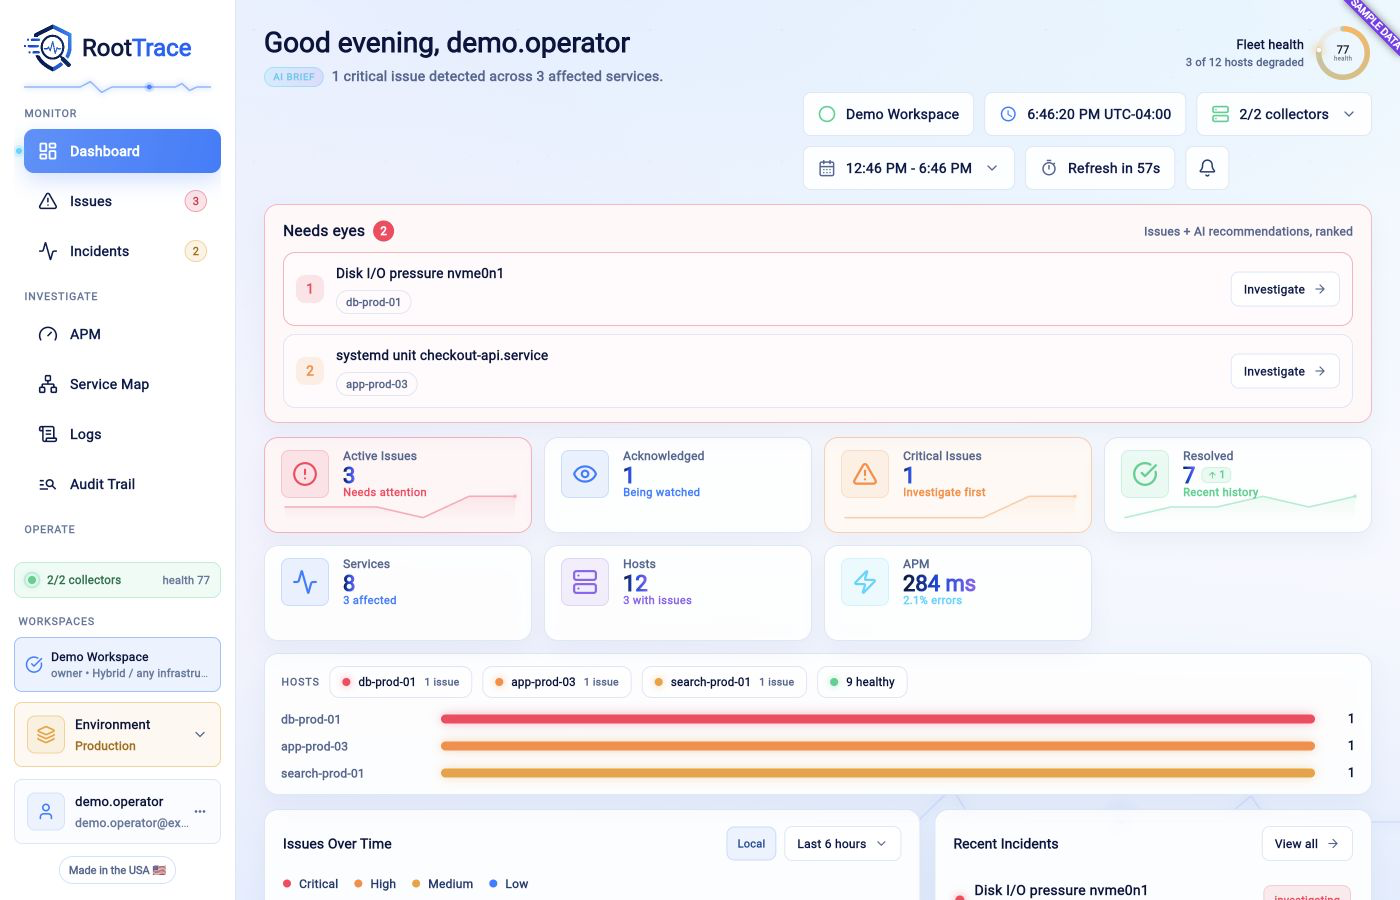
The next move is yours: integrate APM, attach a test collector, and turn noise into answers.
4. Send it something
An empty monitoring tool is not very interesting. On a Linux host, the collector comes from a signed package repository:
sudo curl -fsSL -o /etc/yum.repos.d/roottrace.repo https://packages.roottrace.io/dnf/roottrace.repo
sudo dnf install roottrace-collector
Debian and Ubuntu use the apt repo at the same host. Installing deliberately does not start the service, because it does not yet know your token or your API URL. Set those in /etc/roottrace/collector.env, run roottrace-collector-setup apply, then enable the unit. First diagnostics land about a minute later.
The collector is outbound-only and opens no inbound ports, so there is no firewall exception to add.
What this leaves out
Being direct about it, because a quickstart that pretends to be a deployment is how people get hurt:
- No TLS. Traffic is plain HTTP, which is why it binds to localhost.
- No MongoDB authentication, and a single standalone node rather than a replica set. Sharded MongoDB is supported when the URI points at your
mongosrouter(s); RootTrace shards its own collections, and does so by default in production. - No backups, and no verified restore.
- A floating
latesttag rather than a pinned digest, and no signature verification. - No Elasticsearch, so features that require semantic search are unavailable (recommended). The core monitoring path does not require it.
- One day of retention, which is the free tier's limit.
Do not fix these one at a time. The install guide is the supported path and covers all of them together.
What this short run proves
It does not prove RootTrace is ready for your production network. It proves the parts an evaluation should answer before a purchase conversation: the image is public, the server can start without a vendor account or licence, the first user is controlled by a bootstrap token, the UI is local, and teardown is under your control.
Attach a collector to a Linux host and the empty dashboard becomes a working product evaluation. You can inspect the collector's outbound connection, trigger a harmless test failure, and decide from your own evidence whether the workflow helps.
Tearing it down
docker compose down -vThat removes the Compose containers, network, and named volume. The account and monitoring data in that volume go with it. The downloaded images, your Compose file, and .env file remain until you remove them separately.
That last part is the reason this walkthrough has no vendor-account step at the start and no licence step at the end. You can begin and remove the evaluation without asking us to change external state.
RootTrace is self-hosted monitoring and incident intelligence for teams. The quickstart is local and disposable; the production install guide adds the security and durability this evaluation deliberately leaves out. roottrace.io